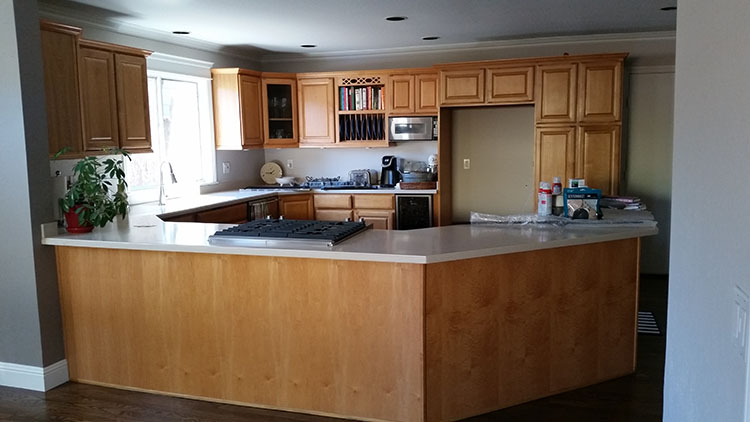
Their kitchen island was wrapped in sheetrock which was common for this neighborhood. By removing the sheetrock, replacing it with high quality plywood and adding molding before painting, I was able to update the look of the island.
This created a significantly more upscale presentation of the entire kitchen. I used a faux finish to add texture and dimension, finishing with several clear coats to protect the surface in this high-traffic area of the house.
The cabinets were next. Any good painter will tell you that the key to a well-executed painting job is the prep-work. While other painters may cut corners here to save time and money, I take extra effort on this behind-the-scenes step. Skimping on prep will leave you with noticeable brush strokes, uneven surfaces, and unsightly bumps and lumps. My meticulous attention to perfect prep means the cabinets look perfect at the end, which I pride myself on.
“They revamped the entire kitchen much less expensively than installing new cabinets, giving them the look and feel of a completely remodeled kitchen at a fraction of the price.”
I took the doors to my shop to allow me to spread out. Here I sanded off the clear coat, sprayed primer on the doors, sanded again, primed a second time, and sanded yet again before painting in the final color. I sprayed two to three coats of paint specific for cabinets, then do the faux finish on each surface by hand for depth and dimension, finally I sprayed several coats of clear coat so the finish would resist wear. This proprietary process ensured that the paint would stick, that the grain in such low-grain woods as oak would not dominate, and the cabinets would retain their beauty for years to come.

While the cabinet doors were done off site, the cabinet boxes were sanded and painted while still mounted in the kitchen. There was no need for the homeowner to take the contents out of the cabinets, since the sander was equipped with a powerful vacuum. The dust was filtered, leaving the cabinets clean and ready to be reassembled when the paint dried. Some homeowners opt to replace some solid cabinet doors with glass-fronted ones, but in this home, they decided to stick with the solid look for all the doors.
For the drawers, we replaced glides and slides so that the drawers would open and close seamlessly, then painted with the same process and attention to detail as the cabinet doors. I also changed out cabinet hardware where needed.
The final touch to finish the updated look of the kitchen was to add double crown molding at the ceiling. To do this, I used baseboards turned upside down, then installed crown molding onto that for a rich and elegant finish. Faux finish glaze paint added dimension to the wood, and in combination with the newly painted cabinets, brought the entire kitchen together with a warm, rich, vibrant look that updated and transformed the room.
Behold the Transformation!
BEFORE:

AFTER:

Now it’s your turn. If your kitchen is showing the signs of wear, or you are looking for a beautiful new look without the pricetag of replacing cabinets, contact Jennifer Davis Painting for a free estimate.
Read more about our kitchen cabinet painting services.


